Your Water Heater’s Maintenance Timeline
Storage tank water heaters are the type of appliance that can hum along for years. Once installed, they don’t need constant attention. However, they do require maintenance to keep them running at peak efficiency. These are mostly simple tasks that you can do yourself, but you can also hire a pro to perform regular maintenance for you. Here are some tips on how you can keep your water heater working proficiently, and how often it will need maintenance.
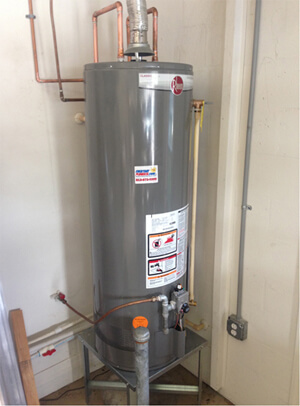
Understanding Your Water Heater
Be sure to review the owner’s manual that came with your water heater. It usually spells out necessary maintenance tasks, as well as other important information, such as safety precautions and size specifications. When in doubt, refer to the manual. If you can’t find the manual, check the manufacturer’s website for instructions on obtaining a copy.
Consult a professional before attempting any maintenance tasks, and make sure that the water line and the power to the water heater are safely shut off before beginning.
Ongoing Maintenance
Keep the area around the water heater free of clutter. Gas heaters have vents at the bottom that must be kept clear to aid in the heating element combustion. Never store anything with flammable vapors, such as gasoline or paint thinner, near a gas water heater. Providing a clear space around the appliance makes it easy to get to the water shutoff in an emergency. It also gives repairmen room to work on the heater, should a service call be necessary.
Every Few Months
Drain some of the tank’s water to remove the sediment that collects on the bottom of the tank. All incoming water contains sediment that, over time, can hinder the performance of your water heater. The amount you need to drain will depend on the condition of the water.
- Shut off the power. For electric heaters, shut the unit down completely. For gas heaters, move the control dial to “pilot.
- Turn off the cold water supply to the tank.
- Connect a garden hose to the drain valve located near the bottom of the tank, and then run the hose to a drain.
- Open a hot water faucet in a nearby sink and leave it open.
- Open the water heater’s drain valve. Caution: Be careful. The water will be very hot.
- Drain the tank until the water runs clear. This may take a few minutes or longer.Pro Tip: Plumbers will often turn the water on and off a few times to help stir up the sediment at the bottom of the tank.
- Once the water is clear, close the drain valve and turn on the water supply. You’ll know the tank is full when water is flowing through the faucet you left open earlier.
- When the tank is full, turn the power back on.
The frequency of this procedure will depend on the condition of your water. If the water is perfectly clear from the start, you probably don’t need to drain your tank often. If the water is very dirty, you may need to drain it more frequently.
Annually
Test the temperature/pressure-relief valve. It’s located near the top of the storage tank and should be attached to a long tube that extends almost to the bottom of the tank. The valve is designed to relieve pressure that builds up above acceptable levels inside the tank.
- Place a small bucket under the extension tube.
- Lift the valve up, and then push the lever back into position to close the valve. Caution: Stand back because hot water will be released from the valve.
- If there is no release of pressure in the form of air and/or water, the valve may be defective. Consult a plumber to have it fixed.
Check to make sure the venting system is operating properly on your gas water heater. On top of the tank is a draft hood raised above the flue, which is located inside the tank. The hood should be attached to connectors that run to the chimney. If the flue is not drawing adequately, gases that should be going up the chimney could be lingering into the room.
- Turn the temperature controls up so that the burner starts. Wait a few minutes to give the unit time to get going.
- Place your fingers near the opening between the hood and the top of the tank. If you feel air brush across your fingers and up the draft hood, the flue is drawing properly, so you can reset the water to normal operating temperature.
- If you don’t feel air, the flue may not be drawing. Black soot around the top of the tank and the vent hood is also a sign that system is not venting properly. There could be a couple of reasons for the problem, including blockage in the chimney. To be safe, shut down the unit and call in a professional to inspect the system.
Every Few Years
Check the anode rod, and replace it, if necessary. The rod is usually made of aluminum, magnesium, zinc, or a combination of corrodible metals, and is suspended inside the tank. Its purpose is to attract any corrosive elements in the water. The theory is that any corrosion that attacks the rod will not attack the inside walls of the tank. Eventually, corrosion will get the best of the rod, and a new one must take its place.
- Turn off the power to the water heater, and shut off the water.
- Drain off 4 or 5 gallons of water through the drain valve. This will help prevent water splashing up on you as you remove the rod. It is not necessary to drain the entire tank.
- Locate the rod. It’s often threaded to the top of the tank. You may see it right away, or you may need to consult your manual for its location.
- To remove the rod, you will need a ratchet with a 1-1/16-inch socket. Have a helper hold the tank steady while you loosen the rod, and then carefully pull it out.
- If there are sections of the rod missing, you should replace the rod. If necessary, cut the new rod to match the size of the old one. Apply some plumber’s tape to the threads of the new rod, and then carefully lower it into the tank and tighten it.
- Turn the water on and wait for the tank to fill up again. Then, turn the power to the water heater back on.
Keeping your water heater running at optimal performance can save you from needing to replace the unit more often than necessary. Performing regular maintenance will ultimately help extend the life of your water heater, which should be a priority for all homeowners.